How to... Add a new Scheduled trigger via the Trigger (Scheduled) Browse or Edit windows
The following steps describe how to add a new Scheduled trigger.
1. Click the Insert new record button.
2. In the Header section of the Scheduled Trigger window, enter details in the Code, Description, Site, Use Qualification Query, Use Notification Query and IsActive options.
3. In the Details section, use the Schedule lookup field to configure the schedule, You can set a trigger to run daily, weekly, or once off:
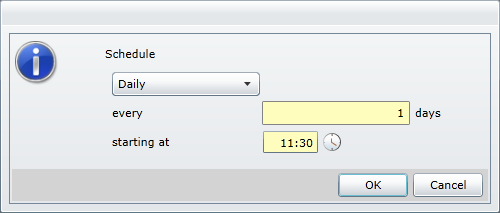
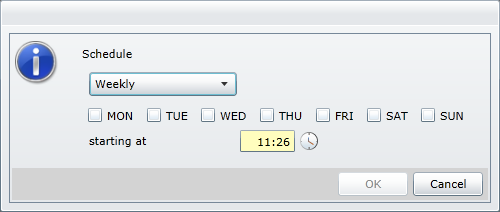
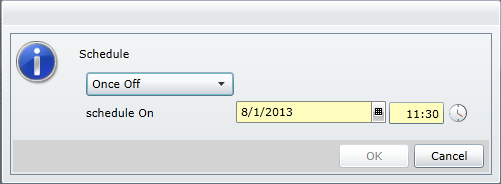
When you have configured all available settings, click the OK button.
4. After configuring the schedule, select the Notifications tab.
5. Click the Insert new record button.
6. A new notification record is added. Use the text boxes and lookup fields to configure the notification by configuring details such as the notification template you want to use and who the notification should be sent to.
7. If you want to include an attachment with the notification, click the Insert new record button on the Attachments tab.
Note! You cannot attach an SQL Server Report (SSRS) that includes query-based parameters.
8. A new attachment record is added. Use the text boxes and lookup fields to configure the attachment by configuring details such as the attachment code and content.
9. After configuring all the necessary details, to create the new Scheduled trigger, select the Save changes button.