If the Use Location Staff Members system option is enabled, automatic daily allocation will use the location staff member information to assign work task labour items to staff members. Work will only be allocated to staff members eligible to perform work in the asset's location. In addition to this, automatic daily allocation uses the staff member sequence values to determine which staff members are prioritised for work allocation.
For example, if this option is enabled, a work task labour item for an asset located in Port Alfred will be assigned to the staff member with the highest priority in that location.
This topic explains how to:
How to ... Add Staff Members to a Location
Adding staff members to locations enables you to specify which staff members are eligible to perform work at specific locations.
NOTE: A staff member can be added to multiple locations.
To add a staff member to a location, you need to:
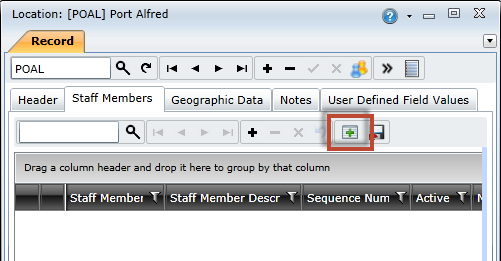
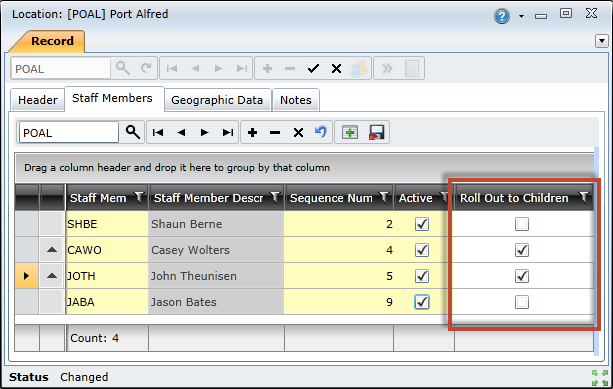
Open the location's edit window and click the Staff Members tab.
Click the Add Staff Members ( ) button on the toolbar to open the Staff lookup window.
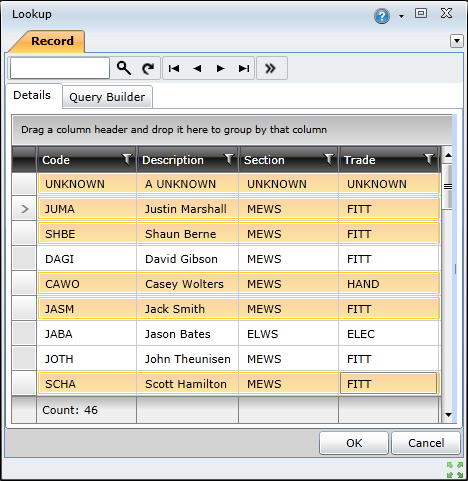
Select the required staff members, and then click the OK button to add the selected staff members.
NOTE: Hold the Shift key to select multiple staff members.
Click the Save Changes ( ) button to save the location.
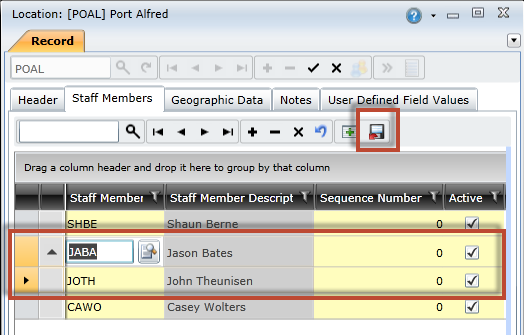
ALTERNATIVELY, click the Insert New Record ( ) button to add a blank record, then click the lookup button in the Staff Member column to open the Staff lookup window.
How to ... Specify Staff Member Sequences
A location's staff member sequence determines how work is assigned when using the automatic daily allocation functionality.
To specify a location's staff member sequence, you need to:
Open the location's edit window and click the Staff Members tab.
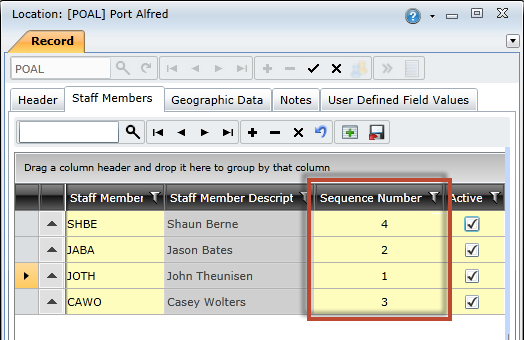
For each staff member in the grid, click the Sequence Number field and specify a sequence value.
NOTE: Lower sequence values indicate higher priority.
Click the Save Changes () button to save the location.
How to ... Force Roll Out Select Staff Member Records
This functionality enables you to make staff member changes in a parent location, and then 'push' the changes down to all child locations that inherit from it. Forcing the rollout means that ALL staff member details for the selected records will be rolled out to child locations, regardless of whether they have been updated or not. With this functionality, you need to manually select the records you want to roll out.
For example, consider the following parent and child locations and their staff members. Green items in the parent location indicate changes. Blue items in the child location show the effects of the forced rollout. Note the following effects:
|
Parent location |
||
| Staff Member | Sequence Number | Active |
| Justin | 1 | Yes |
| Jack | 2 | Yes |
| John | 4 | No → Yes |
|
Child location |
||
| Staff Member | Sequence Number | Active |
| → Justin | → 1 | → Yes |
| Jack | 2 | Yes |
| John | 3 → 4 | No → Yes |
To force roll out changes, you need to do the following:
Open the parent location's edit window and click the Staff Members tab.
Make the required changes.
Click the Save Changes () button to save the location.
Hold the Shift key and select the staff members you want to roll out, and then click the Force Rollout ( ) button on the toolbar.
NOTE: Staff members will be added to child locations where they do not already exist.
How to ... Roll Out Pending Changes for Select Staff Members
This functionality enables you to roll out only pending changes for selected staff members. When using this functionality, changes saved to the parent's staff member records will be rolled out to the child locations as well.
To roll out pending changes, you need to do the following:
Open the parent location's edit window and click the Staff Members tab.
Make the required changes.
Select the Roll Out to Children check box for the records you want to roll out.
Click the Save Changes () button to save the location.