Set the tab order
The tab order functionality lets you do the following:
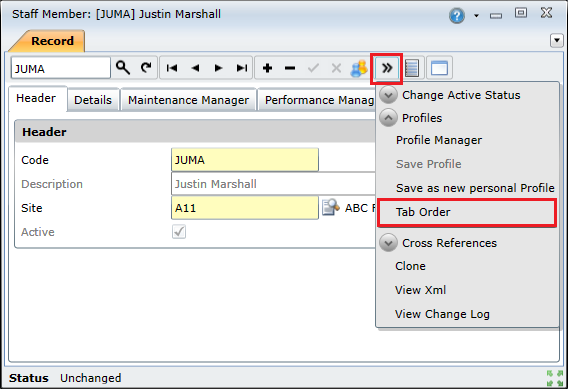
Tab order functionality is available for all edit windows in On Key. To access the tab order functionality, you need to open the edit window you want to customise, click the Additional Options button on the toolbar, expand Profiles, and then click Tab Order.
Showing and hiding edit window tabs, field groups and fields
This functionality is useful if you only use a specific subset of the tabs and fields that are available in an edit window, and you want to hide the fields you do not use.
To do this, you need to:
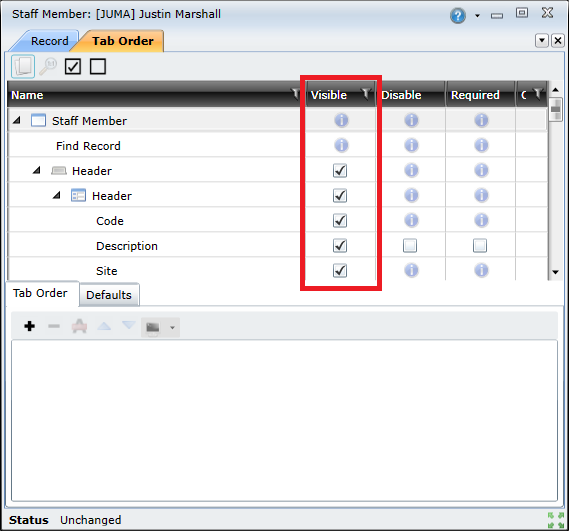
- Open the Tab Order options for the specific edit window.
- Locate the tab or field name in the list, and then deselect the check box in the Visible column to hide it, or select the check box to show it.
Making fields mandatory or read-only
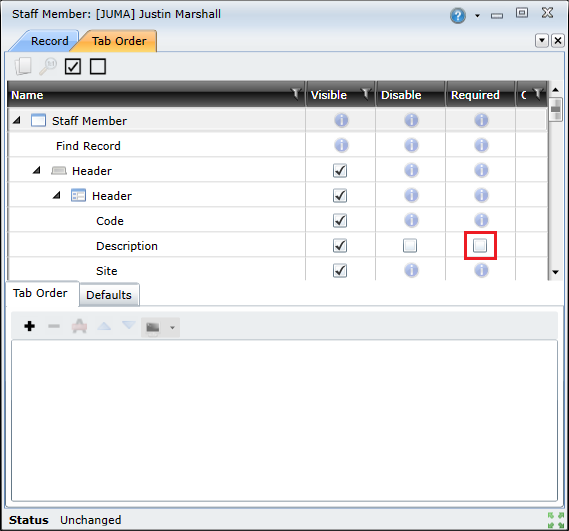
This functionality enables you to make some fields compulsory in order to perform a save action. To do this, you need to:
- Open the Tab Order options for the specific edit window.
- Locate the field name in the list, and then select the check box in the Required column to make the field mandatory, or select the check box in the Disable column to make it read-only.
Note: Not all fields can be made mandatory or read-only.
Specifying a custom tab order
Tab orders enable you to specify the sequence in which the cursor moves from one data entry control to the next using the keyboard. The tab sequence is usually from left to right, and from top to bottom.
Once the tab order has been defined, users can navigate using the following keys:
- Tab – to navigate to the next field, tab or action in the order
- Shift + Tab – to navigate to the previous field, tab or action in the order
To specify a custom tab order, you need to:
- Open the Tab Order options for the specific edit window.
- Select the tab or field in the top panel and then click the Add (
 ) button to add the selected tab or field to the tab order.

- Repeat this step until you have added all tabs and fields to your tab order.
Note: The order in which the tabs and fields are listed in the Tab Order tab (bottom panel) indicates the sequence in which the cursor will move between them. You can change a tab or field's position in the tab order by selecting it in the list and then pressing  to move it up in the list, or
  to move it down in the list. To remove a tab or field from your tab order, select it in the list and click
  , or click
  to clear the entire tab order.
You can also add edit window actions to your tab order. For example, you can add a save action as the last item in your tab order to shift the focus to the Save button after completing the last field in the sequence. To add an action to your tab order, click  and then select the required action.
Notes:
- Ideally the tab order should match the logical sequence in which information is entered, and simplify data capture by reducing the number of keystrokes.
- Tabbing from a Lookup field to the detailed edit screen, the lookup will fire.
- If a Save button is part of a tab order sequence and is not the last item in the tab order, then the tab order will not reset.
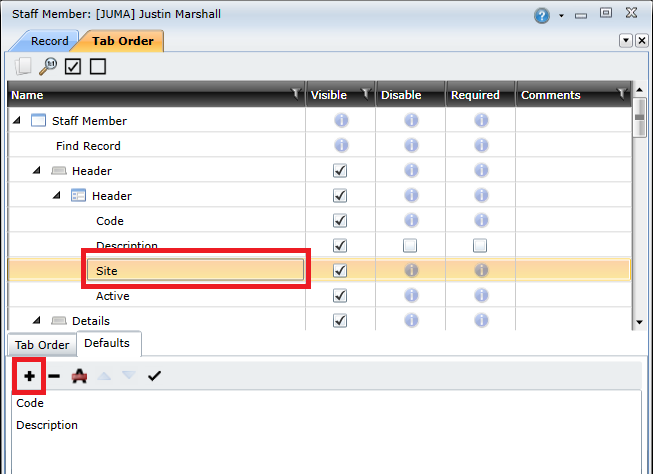
Creating a Defaults tab
This functionality lets you create a new custom tab with specific fields. This is especially useful if your organisation uses a small subset of the available edit window fields that are spread across multiple tabs. Using this functionality, you can combine all of the fields onto one tab, and hide the tabs that are no longer required. This can greatly simplify navigation on edit windows.
Once the default tab has been created, users can navigate using the following keys:
- Tab – to navigate to the next field, tab or action in the order
- Shift + Tab – to navigate to the previous field, tab or action in the order
- Shift +Ctrl + Tab – to navigate to the last field that had focus (if focus was lost)
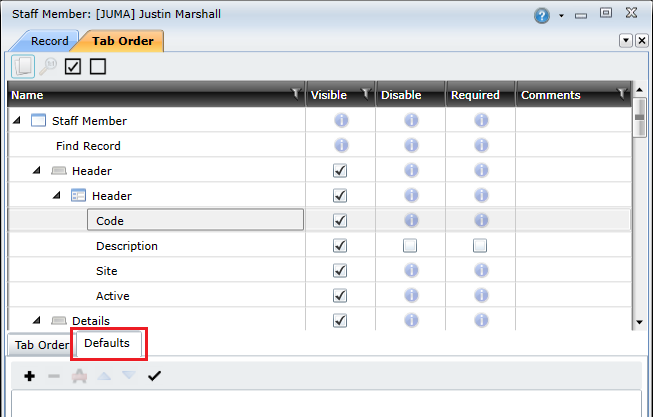
To create a Defaults tab, you need to do the following:
- Open the Tab Order options for the specific edit window.
- Click the Defaults tab.
- Select the fields in the top panel and then click the Add () button to add the selected field to the tab order.
- Click the Apply Defaults (
 ) button after you have added all of the required fields.
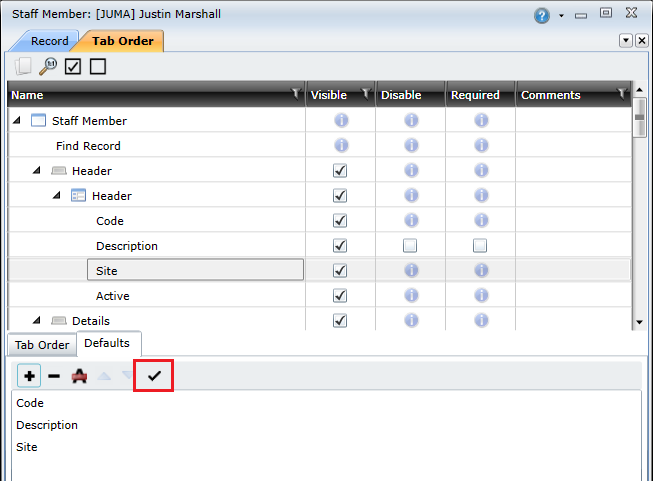
- Hide the tabs that are no longer required.
© 2016 Pragma