
 |
Note: The Daily Allocation functionality will only be available if the Daily Allocation module is enabled. Check your On Key license to determine whether you have access to this functionality.
This topic shows you how to do the following:
How to ... Access the Daily Allocation screen
The Daily Allocation screen can be accessed by clicking the Daily Allocation ( ) button in any of the following screens:
Note: The Daily Allocation button will be disabled if the Daily Allocation module is not enabled. Check your On Key license to determine whether you have access to this functionality.
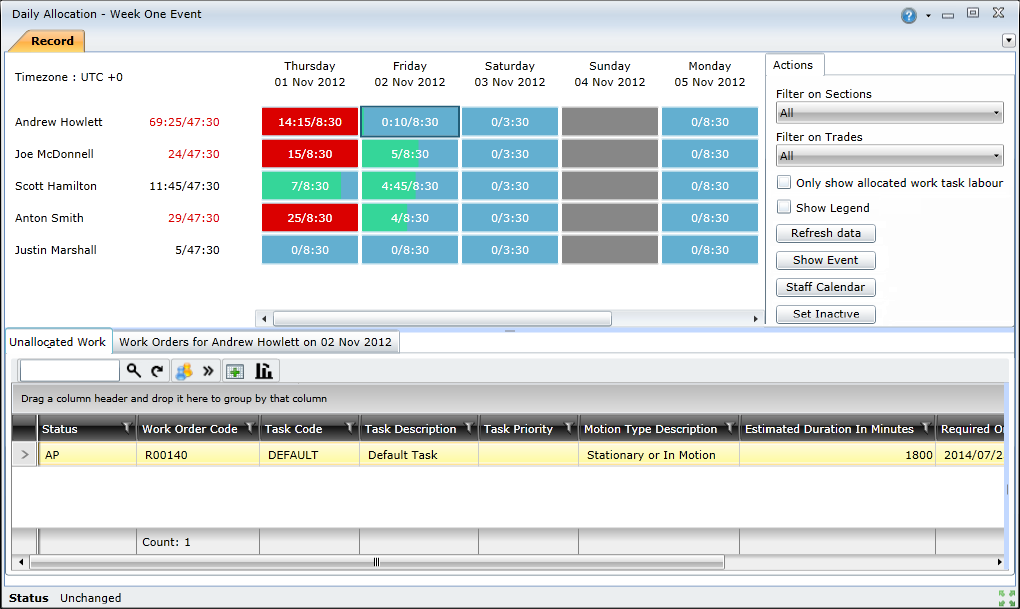
The Daily Allocation screen consists of three panes:
The Staff/Trade pane includes a grid comprising of staff members on the vertical (top-to-bottom) axis, and days on the horizontal (left-to-right) axis. Each block in the grid represents a specific staff member's capacity for a specific day.
Note! The Staff/Trade pane will only list staff members that have been assigned to trades for the scheduling event. A staff member's availability (ie working hours and working days) is determined by their staff calendar.
This pane offers the following functionality:
The values inside each block indicates a staff member's capacity for that day in the allocated hours/capacity format. For example, a block that shows 6/8, indicates that the staff member has an overall capacity of 8 hours for that day, and has already been allocated 6 hours of work.
The Staff/Trade pane uses the following colours to indicate staff member capacity levels:
| Blue | Available capacity |
| Green | Hours allocated |
| Red | Work allocation is over capacity |
|
Grey |
Staff member is unavailable |
Notes!
The Actions pane enables users to do the following:
The Work task labour pane includes two tabs: Unallocated Work tab and Allocated Work Orders tab. The Unallocated Work tab lists all the work task labour items that can be allocated to staff members. The Allocated Work Orders tab shows the work task labour items that have been allocated to the selected staff member or date.
How to ... Work Across Time Zones
Take careful note of the time difference between the site you are planning for, and your current location when planning work across time zones. The Staff\Trade panel displays information in the site's time zone, which is indicated in the top-left hand corner of the panel. The work task labour items listed in the Work Task Labour pane are displayed in your current time zone (browser time zone), as well as the site's time zone.

How to ... Customise the Daily Allocation Screen
The grid can be filtered to display specific trades or sections. To do this, perform the following steps:
Click the Filter on Sections drop-down list and select the section you want to view
Click the Filter on Trades drop-down list and select the trade you want to view
Select the Only show allocated work task labour checkbox and then click the Refresh data button if you only want to view work task labour records that have been allocated to staff members

You can also group columns in Work task labour pane. This enables you to customise the way in which the work task labour items are displayed. Once you've grouped the columns, click the Profiles ( ) button and then select Save as new personal Profile to save a new profile for future use.
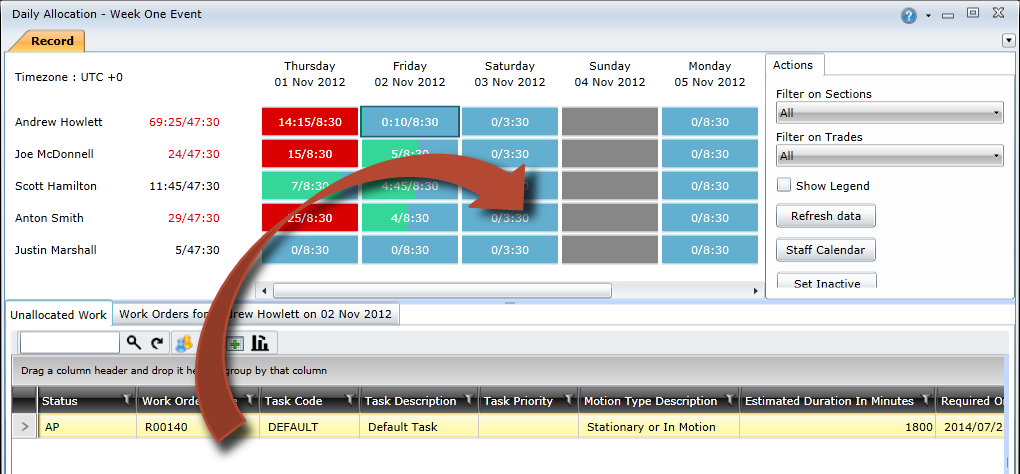
How to ... Manually Allocate Work to Staff Members
Changes are saved as soon as the work task labour item is dropped on the grid, and a calendar activity is created in the relevant staff member's staff calendar.
How to ... Automatically Allocate Work to Staff Members
Visit the Automatic Daily Allocation topic to learn more about how work is allocated.
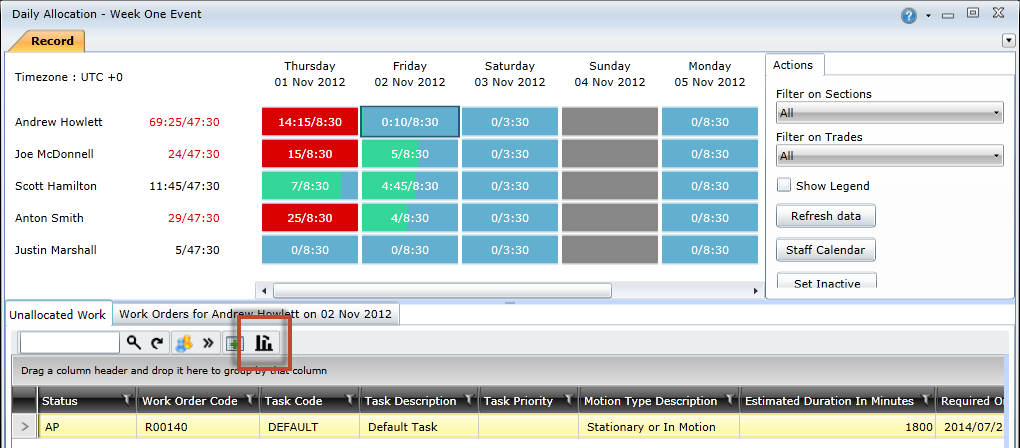
To automatically allocate work, perform the following steps:
 ) button on the Unassigned Work tab.
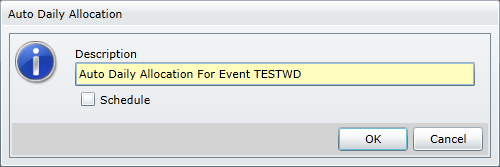
Note! The work task labour item allocation can be refined manually after the automatic allocation has been completed.
Work can be re-assigned to a different staff member if the original staff member is unavailable or over capacity. To do this, perform the following steps:
Note! Changes will be saved as soon as the work task labour item is dropped on the new staff member.
How to ... Carry Over Unfinished Work
Unfinished work task labour items can be carried over to the next day if a staff member is unable to complete it on the allocated date. To do this, perform the following steps:
Open the Daily Allocation screen for the scheduling event.
Select the block where the work task labour item has been allocated.
Click the Allocated Work Order Tasks to view the work task labour items that have been allocated for that specific block in the grid.
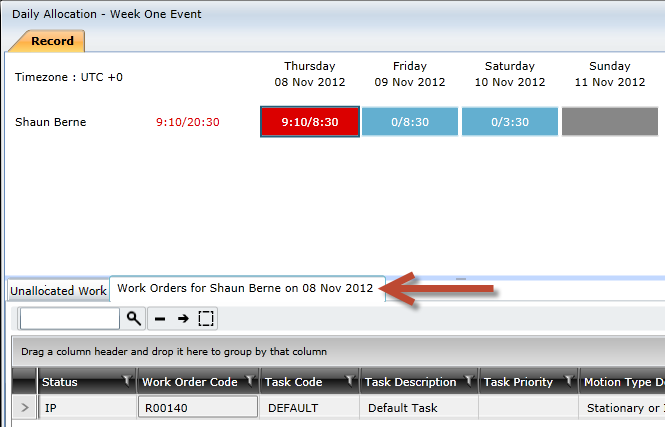
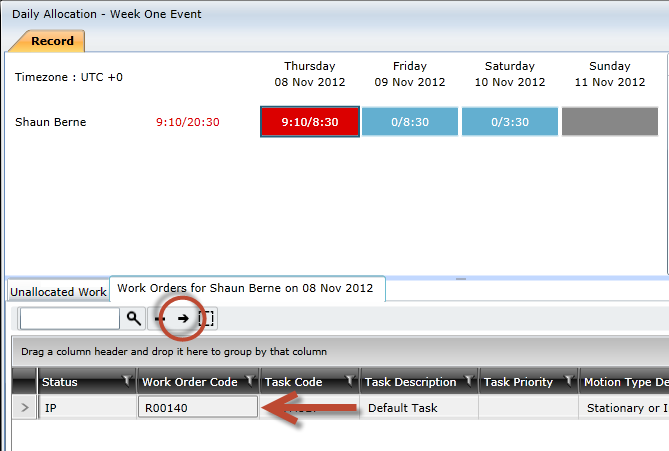
Click the work task labour item that you want to carry over in the list.
Click the Overflow work to another day ( ) button.
 ) button next to the To field to open the calendar.
Note: Only work that is "In Progress" can be carried over.
Time can be marked as "Inactive" if a staff member is not available for work allocation. To do this, perform the following steps:
Open the Daily Allocation screen for the scheduling event.
Select a block in the grid.
Click the Set Inactive button in the Filter pane.
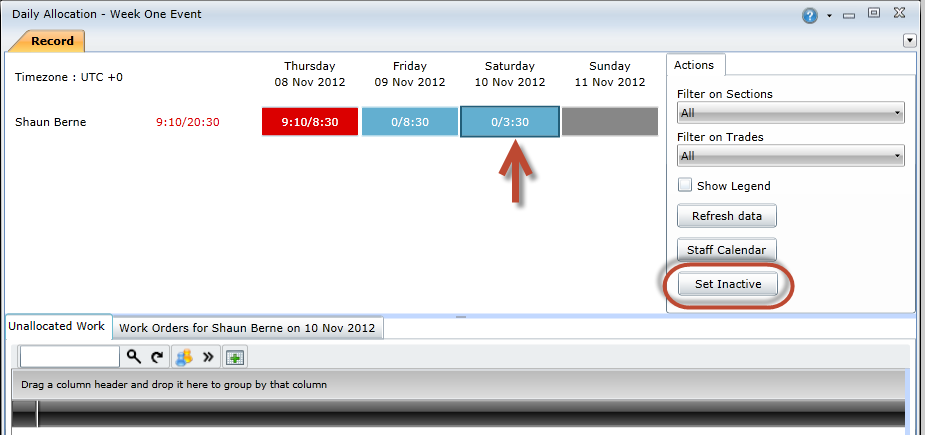
Select the Is On Leave checkbox if the staff member is on leave.
Type a description in the Description text box.
Click the Calendar ( ) buttons to select a start and end date and time.
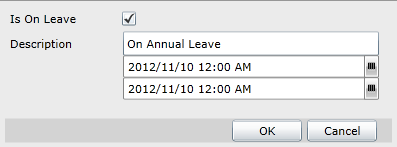
Click the OK button.
Note: Adding inactive time automatically creates an activity in the staff member's calendar.